May 17, 2011

Hey Moon, You want a piece of me!?! C'mon!!!

While using the moon-polluted part of the month to refine some of the technical pieces of this hobby (sickness, addiction, obsession - choose one) I chose to shoot NGC 4565 as the subject for some other testing I was doing. Details on that testing to come later. I took a total of 60 minutes of exposure while the moon was living large just 30º away on Friday night. Except for the gradient of the moonlight, I was really happy with the way that the subs themselves came out. Being that I'm still trying to justify my cost-per-hour in this hobby I thought it might ease the guilt if I processed that set of data too.

I shot 20 exposures at 3 minutes each through the CGEM 1100HD and Hyperstar with my QHY8PRO camera. Data was captured and autoguided with Maxim DL and had the benefit of a Hutech LPS-P2 light pollution filter helping out as well. The original stack of the data looks like this before any post-processing:

NGC4565 Gradient by Mike Wiles, on Flickr

I've been experimenting with doing more of the heavy-lifting type processing in Maxim DL prior to moving over to Photoshop to finish the image.

In Maxim DL:

  • A slight crop of the image to remove the ragged edges from dithering.
  • Auto Remove Gradient
  • Auto Flatten Background
  • Color Balance
  • Remove Background Color
  • Log Stretch
  • Gamma Stretch
  • Save as .tiff and get on with Photoshop

In Photoshop CS5 I did the usual Curves, Levels, Saturation work and saved to a .jpeg Here is the outcome of that processing in the 2.5 degree by 1.5 degree field of the Hyperstar.
NGC4565 Wide Field by Mike Wiles, on Flickr

And finally, a 100% crop of the central area.

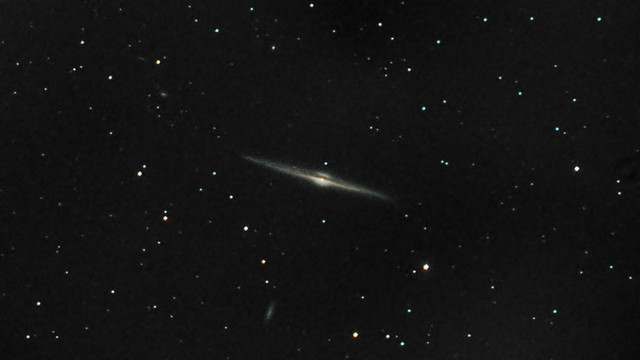
NGC4565 Closeup by Mike Wiles, on Flickr

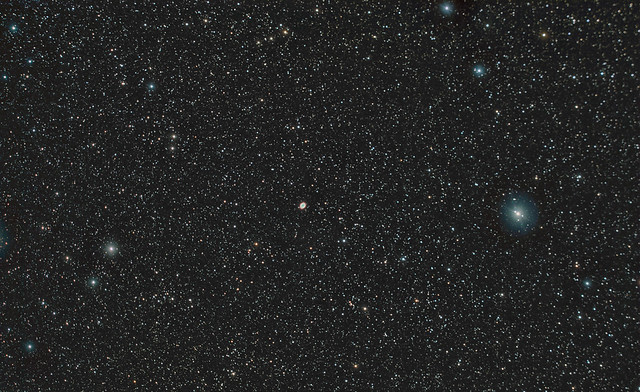
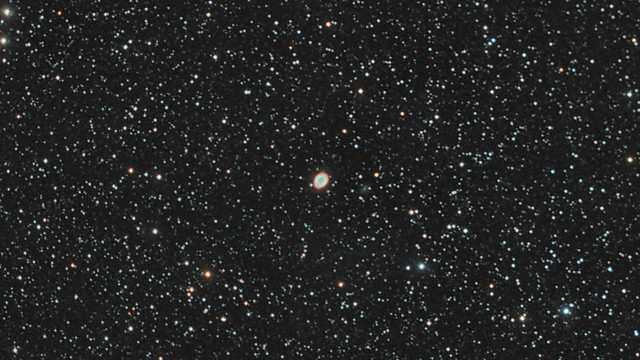
You can see that the image at full resolution is pretty darn noisy from the less than awesome shooting conditions and processing, but it was still a fun shot to process. Using the wide field shot to mask some of that noise gives me an image I'm pretty happy with. Like my recent M57 shot, I don't think this is something I would go out of my way to shoot with the wide field of the Hyperstar, but it's an interesting shot now that I look at it.

I actually took the shots to take some measurements on whether or not using Periodic Error Correction has a positive influence on autoguided images. I haven't studied the data enough yet to offer my own conclusion. I'll cover that in a future post. Please feel free to throw rocks at my images and tell me about it.

Can you tell that I really need to get to a dark sky with some decent weather conditions? I don't know how some of you do it living in places where you go months without being able to image. My hat is off to you for your patience.

May 16, 2011

Imaging M57 with Hyperstar

Yep. Not a misprint my friends. You did just see "M57" and "Hyperstar" in the same sentence. No, I haven't been drinking. Work, weather and other factors have conspired to prevent me from getting some good imaging time from really dark skies....so I've resorted to my own light polluted back yard. This one simply started out as a session to work on Hyperstar collimation and dialing in the autoguiding a little better in an effort to get stars that are more sphere shaped. When I finished, I put the Hutech LPS-P2 filter into the Hyperstar and pointed the scope at M57 which was at about 45º above the horizon at the time directly in the Phoenix Nebula...errr light dome of Phoenix, Arizona. This is a composite of 100 minutes total exposure. I am really pleased so far with the Hutech filter. There was a pretty big gradient in the image but it was simple to process out and I didn't have to fight any weird color bias in the process.

There still seems to be some collimation issues, but overall I'm feeling better about the image than some of my previous stuff. What bothers me still is that the upper right corner of the frame seems to be much worse than anywhere else in the image for less than round stars.

Date: 05/14/2011
Location: Goodyear, Arizona
Telescope & Mount: Hyperstar 3 equipped Celestron CGEM 1100HD
Camera - QHY8PRO
Real Focal Length - 545.3mm f/1.95
Image Scale - 2.95"/pixel
Exposure - 100 x 60 seconds
Calibration: Bias, Flats & Bad Pixel Map - No dark frame subtraction
Software: Maxim DL 5 & Photoshop CS5

While this isn't the type of shot that I'm looking to get on a regular basis, I do find some appeal in the way that the tiny nebula sits in the dense star field. This frame is about 2.5º by 1.5º. The second image is a 100% crop of just the center of the image.


M57 courtesy of the CGEM 1100HD and Hyperstar (click to see full size)


Crop of the center portion of the image.  Galaxy IC1296 is visible to the right of the nebula.


May 13, 2011

Bahtinov Hyperstar

I know what you're thinking.  Some of you old timers read "Bahtinov Hyperstar" and you're sure it's some Romanian phrase that would get my mouth washed out with soap if it were translated to English.  You would be wrong my friends.  The younger ones in the crowd are thinking..."Isn't that the unholy offspring of David Bowie's Ziggy Stardust persona and Siouxsie and the Banshees from the early 80's?  Has it finally returned to prosecute its foul terror on humanity?"  Don't go diving for your still stocked Y2K cellar just yet.  No, it's not that either.  You're thinking of Lady Gaga.  It's a simple focusing mask my friends.  A simple focusing mask.  No need to panic.  Nothing to see here.  Let's move along people.  Let's move along.

http://www.spike-a.com/
If you want to know all that there is to know about a Bahtinov mask, you can find it here.  I'm going to make the assumption that if you're already here, you already know what it is.  The mask as it's been traditionally created does present some problems for those of us that are strung out on Hyperstar imaging.  The problem with the Hyperstar of course is the large central obstruction which is further complicated if you shoot with a DSLR.  This came up as a matter of topic on Cloudy Nights just a few days ago.  At the time I was away on business and unable to provide any pictures or truly useful information on how I'd solved the manual focusing problem with Hyperstar using a Bahtinov mask. 

Pretty simply, I took the normal design for a Bahtinov mask and added a big cutout in the center for the central obstruction of the Hyperstar.  For an 11" telescope, this is about a 4.25" (108 mm) hole in the center.  Second, I cut it in half down the middle so that I could get it onto the telescope without having to remove the camera.  This is especially handy if you shoot with the decidedly non-cylindrical DSLR.  Finally, I attached some cheap adhesive velcro tabs I had laying around to each end so that it would stay in place while focusing.  The mask is pretty crude but it works very, very well.  It cost me about $3 and less than 2 hours of my time to make it.  I got the template for my mask from http://www.focus-mask.com/ but it appears that the site is down or they are out of business.  I had to modify the template for the central obstruction which took the bulk of the time.  The mask is made out of a 20" x 30" sheet of black foam board and I cut it with a razor knife.  I live in the desert where dew is rarely an issue so the foam board has held up pretty well.  If you live in a humid environment, I'd recommend a different material as the foam board will absorb the dew and fall apart pretty much straight away.  So below are a handful of photos and a link to a video at the end that show the 'features' of my mask and how to attach it to the telescope.  Feel free to take any of this and use it for your own mask.  If you find a way to improve it or a better material, drop me a line and tell me about it.  I'd love to hear.


15 Second video showing how simple it is to attach even with the Hyperstar & Camera in place.
The Mask is really nothing more than a normal Bahtinov Mask that I've split down the middle and then cut out the central obstruction.
  
I cut the hole out to be 4.5 inches ( 114 mm) to fit around the Hyperstar lens on a C11.  If you're making your own...mine fits pretty loose.  If I had to do it again, I'd cut it at 4.25" (108 mm).  This is larger than the central obstruction of the mirror alone.


The two pieces are held together by nothing more than a velcro tab that has double sided adhesive.


I cut a sort of bumper for each corner and grooved a vaguely accurate radius on the inner edge of each one.  It does a serviceable job of holding the mask in place while it sits on the telescope.