Nov 30, 2011

A Pox on You, Jimmy Dugan!


It's supposed to be hard. If it
wasn't hard, everyone would
do it. The hard... is what makes
it great.

It was Tom Hanks character Jimmy Dugan in the movie A League of Their Own who said "It's supposed to be hard. If it wasn't hard, everyone would do it. The hard... is what makes it great."  While I can appreciate the wisdom being offered by the fictional alcoholic played by Hanks, I've had some difficulty several temper tantrums actually living those words when it comes to the hobby demoralizing obsession of astrophotography these last few months.  His quote very much describes astronomical imaging in general.  Thus my pronouncement of a pox upon the aforementioned fictional character.  Oh, I've been around and I've been busy, but I've little useful to show for my efforts in that time if we're talking purely about astrophotography.  Not that I'm complaining because there have been so many other awesome things happening that it takes the sting out of my imaging struggles.  I'll see if I can't catch things up over the next week or two.  A lot has happened.


When driving in to the observing
site on the forest service road
you get a great view of the
dome housing the Discovery
Channel Telescope.

 It all started back in September when I made the decision to get one last trip up North in before winter took over the mountainous terrain of northern Arizona.  The Saguaro Astronomy Club has an observing site near Happy Jack in the shadow of the Discovery Channel Telescope and I've observed and imaged from there with great success on multiple occasions.  This was not to be one of those occasions and it afflicted all who came to the site that particular weekend.  My wife and kids had exercised a greater measure of common sense than I possess and chose not to come to 7000' (2133m) elevation at the end of September to sleep in a tent.  Cue the foreshadowing for a future post as it was very, very cold in the tent.  I met some friends from my astronomy club who were all more prepared for the autumn weather than I was since they all owned recreational vehicles of some sort to keep them warm at night. 


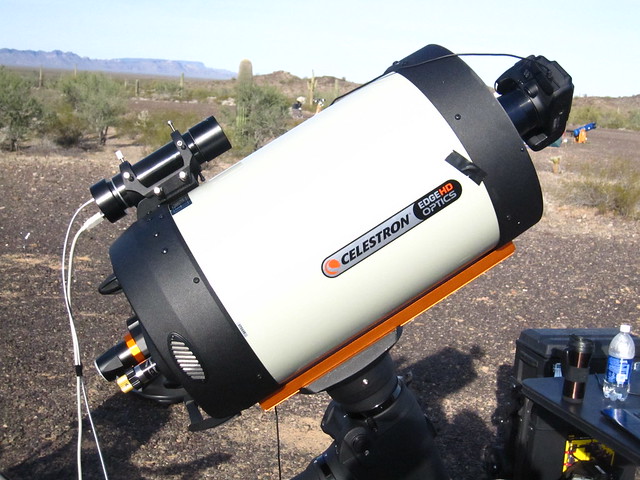
Ken's new custom pier for his
CGE Pro mounted C14 is just
awesome.
  I was quite excited to see my friend and fellow imager Ken because he'd added some new equipment to his setup and I was anxious to ogle it before sunset.  He had purchased a sexy new crayford focuser for his C14 and it didn't disappoint.  He had also added the Starizona SCT Corrector to his arsenal and I was interested to see some of his results. But wait - there's more!!  What he hadn't told me was that he found the act of hoisting that C14 optical tube onto the tripod mounted CGE Pro to be as difficult as you would imagine.  The C14 is a generous 40+ pounds and the saddle of the CGE Pro sits somewhere around 5.5 feet (1.67m) off of the ground.  To solve his problem, he had commissioned the construction of a portable pier from a local welder somewhere in Scottsdale.  I forgot to ask because I was so blown away by the coolness of the pier - but the whole rig is easily 2 feet shorter now and getting the telescope into the saddle of the mount is a much less risky affair.

My friends Mitch & Lori arrived in time to get setup before dark and a couple of other observers were there as well.  The night sky was glorious - truly glorious.  Crisp and cool air with unbelievable transparency and a limiting magnitude somewhere around 6.5.  It was only nightfall that alerted me to the presence of the unmentionable astronomer - Murphy.  Yes, he of the famous law and he was displeased with all in attendance.  First it struck Lori who was having trouble getting her laptop to talk to any of the imaging equipment.  Then another imager named Jim had some sort of power surge that blew out his laptop - forever.  It had taken the laptop dirtnap.  Another observer gave up early and retreated to his class A motorhome to watch baseball.

I was having massive struggles of my own.  As I attempted to align the telescope I simply couldn't get it to accurately point at anything.  Each slew to a new alignment star would result in the pointing being off by upwards of 10º each time.  I checked and rechecked everything I could think of but I just couldn't get the mount to behave well enough to even get a useable alignment out of it.  I looked longingly at my 15" Obsession waiting patiently at the other end of my observing area to be put to some good use visually.  Instead I chose to continue fighting with my temperamental CGE mount.  I eventually figured out that the mount was missing it's target always in declination by up to 10º and it wasn't consistent in magnitude or direction.  Eventually, knowing that I had a decent polar alignment I took what I could get and resolved to slew manually with the keypad.  I would find my targets and plate solve my way to the framed image that I wanted.  By this time it was after 11pm and my frustration level was off the chart.  I kicked off a series of exposures of M31, but seeing that the autoguider was having to work really hard it didn't expect much from the effort.  M31 was the only object I attempted to shoot the entire weekend.  To add the final punctuation mark to the evening, Ken's netbook was the next electronic device to go take a dirtnap.  A power spike of some sort blew out that piece of equipment as well.  Clearly wasn't supposed to be a great night for imaging.  The processing is overdone and garish, but this was the result of my efforts on a night I'd generally like to forget.


Looking over at the Obsession, I realized that I had wasted most of a night of nearly perfect observing conditions wrestling with astrophotography gear when I could have been enjoying the heavens.  In great frustration I resolved at that point that I wouldn't again waste another great night with a camera when I could get something enjoyable out of it with my own eyes.  I spent a very chilly night buried in a sleeping bag in the tent in anticipation of a night of nothing but visual observing on Saturday.  It was sometime around the point where the temperature dropped below freezing that I realized I might be getting too old for cold weather tent camping.  Saturday night's observing didn't happen.  Clouds rolled in and never left.  Soon after dark on Saturday night I packed up and went home defeated.

The next weekend I took the mount down to Starizona to have it looked at, and Dean spent several hours working on it working it over.  Let me just say now, that Dean Koenig of Starizona is the James Brown of amateur astronomy.  That is to say, he's the hardest working man in the telescope business.  Any time I go to see him he has twenty different things going on and he still goes far above and beyond the call of duty in his efforts.  Talking with other people that I know, they say the same things about him and all the crew down there.  They're truly an asset and I hope the astronomy community of Tucson recognizes how good they have it with him being the local shop.  He took it apart and regreased it, tightened everything up and adjusted the backlash.  It seemed to behave like a brand new mount and I was excited to get out and put it through its paces.  That wouldn't come for a couple of weeks.  More on that next time.


Sep 20, 2011

She Blinded Me With Science


 Amateur astronomy has long been a pursuit that loves to debate the controversial topics, even from its earliest days.  All those hours spent studying, observing and watching the sky frees the mind enough that it can form hypotheses and compare them with those of nearby observing companions.  The earliest known controversy occurred one night long ago when one observant dinosaur looked to the heavens and said, "Look, a meteor!  I think it's going to hit the ground!"  His observing buddy looked up, pondered the scene for a moment and said, "No it isn't."  History doesn't record for us the rest of that conversation.  Thus was established the scientific method as it's typically practiced in amateur astronomy circles.  These discussions contributed to some of the most fundamental philosophical changes ever conceived in the early 1600's when everyone in the world said "The Earth is the center of the Universe".  To which Galileo simply replied, "No it isn't." 
                A topic that seems to generate slightly less debate amongst modern amateurs is the subject of star party light pollution and there' s no shortage of opinions on the topic.  With the advent of electronic go-to telescopes, CCD Cameras and modern astronomical software the laptop computer has invaded star parties worldwide.  The encroachment of electronics onto the observing field has been one of uneasy tension since the successful release of the Meade LX200 line of go-to telescopes back in 1992.  The noise of the coffee grinder mount slewing across the sky forever changed the landscape of the star party.  In the years since, more and more electronics have come to the observing field.  Among them has been the advent of the laptop computer and a significant amount of controversy. 
                Some observers swear by them and their use in the field.  Some observers insist that they're a nuisance and have a disruptive influence on productive visual observing.  The modern astrophotographer has little choice but to use a laptop computer in the field for CCD imaging.  The problem is that a laptop computer can generate an enormous amount of unwanted light on the observing field if they're not properly shielded.  Some would maintain that it's not possible to properly shield a laptop computer in the field to preserve night vision.  For someone who has a deep love of  hopeless addiction to astrophotography like I do this presents a conundrum.  I also enjoy visual observing and the fellowship of observing with other members of my club.  I was quite cranky when astrophotographers were sequestered to a separate end of the airstrip at this year's Messier Marathon.  "My laptop and the way that it's shielded is less damaging to night vision than many of the red lights that I see on the observing field on any given night!!".  "Why do we have to go to the North end of the observing field?  The visual observers should have to move to the south end if it bothers them so much!!"  My own reactive hyperbole does nothing to further the discussion or find a way for all observers to co-exist peacefully.    So instead of writing my own defensive but highly entertaining rant, I've opted to stage my own informal experiment to compare the effects of various observing field light sources on night adaptation.

 Test Subjects

 My test is designed to measure the amount of light pollution generated by five different test subjects:
·         Laptop Computer - Unshielded:  Anyone not named Ray Charles knows that this will be the most obnoxious test case in the group.  The test will be done using a 16.4" Sony laptop and a SkyTools 3 generated chart of M31 with the laptop screen at full brightness.  No red film or "night vision mode" is employed for this test. 

·         Laptop Computer - Shielded:  Naturally this will be a test of the laptop as I use it in the field.  I have used a laptop for almost 10 years in the field, even for visual observing.  The test will be done using the same laptop and a SkyTools 3 generated chart of M31 with the laptop screen at minimum brightness and covered with a sheet of fitted, dark red acrylic plastic.  In addition, the "night vision" mode implemented by SkyTools 3 will be turned on.

·         Regular Star Chart/Dim Red Light:  A common red LED flashlight (Celestron Item #93588) with the dial set to "minimum" and a chart from Uranometria 2000.0.  The light itself will be suspended over the chart about 8 inches (20cm) away from the paper to approximate a typical observer's use in the field.

·         Regular Star Chart/Medium Red Light:  The same LED flashlight with the dial set to its halfway point and a chart from Uranometria 2000.0.  The purpose of the medium light test is to establish a result for a standard red light that is typical of an average observer's use.

·         Regular Star Chart/Bright Red Light:  The same red LED flashlight and Uranometria chart, this time with the brightness dial set to "maximum".

            Test Conditions

·         The Eye:  To provide an objective means of measuring the results I employed a Canon 60D DSLR camera operating at ISO 800 with an 18mm f/3.5 lens.    This is in an attempt to approximate the optical specifications of the average human eye without a negative impact on the financial specifications of this particular observer's bank account. 

·         The Measurement:  Each test subject will be photographed in a darkened room in aperture priority mode.  By using aperture priority mode, the camera will adjust the length of the exposure based on the amount of light hitting the light meter (center weighted average metering).   A shorter exposure indicates a more destructive light source.  A longer exposure indicates a more night vision friendly light source. 

·          The Observing Conditions:  Measurements will be taken from two distances.  The first will be from 30 inches (76 cm) to approximate the effect of the light source on the observer that might be using it.  The second will be from a distance of 10 feet (3 m) to approximate the effect of the light source on a nearby observer. 

            Test Results

                I conducted all of the photography in my state of the art darkened laboratory which also doubles as the storage room for my astronomy and camping gear in its spare time.  I conducted all of the tests as described before learning that there wasn't a memory card in the camera.  I put a memory card in the camera and conducted the tests again.  The table below lists the results of each test scenario.  As would be expected  an unshielded laptop computer will instantly turn you into one of the fabled three blind mice.  The main point of the experiment though was the comparison of a shielded laptop with that of a standard red LED flashlight.  Results show that a properly shielded laptop computer is no more damaging to an observers night vision than the ubiquitous red LED torch that we all use - placing 2nd overall of the five test cases.
                In the table below are the test results listed in order from the dimmest to the brightest.  The 2nd and 3rd columns show the results of the tests from a distance of 30 inches.  My patent pending and proprietary "Fried Retina" Factor measures the additional light output of each additional test when compared to the dim red light test.  For instance, an unshielded laptop is 250 times brighter than a dim red light. The 4th column shows the test results as measured from a distance of 10 feet - designed to measure the effect of the light source on nearby observers.   The magnitude column attempts to express the results in the form of star magnitudes as another basis of comparison.  For instance, if an unshielded laptop is equivalent to Vega (0.0 magnitude), then a dim red light shines with the magnitude of a 6th magnitude star.
Test Case
30 in. Exposure
FR Factor*
Magnitude
10 ft Exposure
Dim Red Light
5 seconds
1
6.0
8 seconds
Shielded Laptop
3.2 seconds
1.56
5.6
6 seconds
Medium Red Light
2 seconds
2.5
5.0
8 seconds
Bright Red Light
1/3 second
15
3.4
4 seconds
Unshielded Laptop
1/50 second
250
0.0
.6 seconds
                                *FR Factor - Fried Retina Factor
                My own subjective thoughts on the experiment:
                Dim Red Light:  The output created by the light source at this setting would have been unusable for me.  Ten years ago I would have been able to use this light with a chart, but there's no way that I could do it now with my aging peepers.  I believe that very few observers would be able to use the light at this dim setting.
                Shielded Laptop:  The laptop with all of the shielding methods in place is a about 1/2 f stop brighter than a dim red light.  This is right in line with a typical observers red flashlight that I typically see on the observing field.  I did find it interesting that at a distance of 10 feet the laptop appears to be marginally brighter than a red light at medium setting.  This is almost certainly due to the fact that it's still a backlit light source. 
                Medium Red Light:  This light setting is a touch brighter than what I see from most observers at a star party and would be too bright for me to use without damaging night vision unnecessarily.  I actually added this test after completing the other four in an effort to provide a fairer comparison of real world conditions.   
                Bright Red Light:  This light was really, really bright.  I can say that I've never seen an observer use a red light to look at a star chart at this setting.  I have used a light at this setting when crossing the observing field to keep an eye out for tripping hazards like dark colored dogs sleeping on the ground or random satellite dishes.  Don't laugh.  I've found myself face first in the ground because of both. 
Figure 1:  Comparison photo showing a 3.2 second exposure of a shielded laptop, and a medium brightness red LED flashlight.

            Conclusion

                In a case of astronomy imitating life, everything old eventually becomes new again.  The laptop computer, go-to hand controller and smartphone are simply new expressions of an old issue:  proper light control.  A properly shielded laptop is no more damaging to night vision than a properly shielded flashlight.  Even with the influx of technological advances to the observing field the age old task of maintaining proper dark adaptation is still the same, just in a different form.    Without question, there are additional precautions necessary with many laptops.  In my case I generally take four steps with my laptop on the observing field to properly shield it for myself and my fellow observers:
1.       Red Fitted Acrylic Cover:  I cover the laptop screen with a dark red fitted cover and tape it down to prevent any unfiltered light from leaking out of the screen.  These can be custom ordered from http://www.tapplastics.com/shop/product.php?pid=519 .  I also cover every indicator light on the laptop with electrical tape. 

2.       Red Light Mode:  Most charting/observing programs have a night mode that will turn everything on the screen to a red light type of color scheme in an effort to help.  I use SkyTools 3.  The red light mode in Sky Tools 3 turns everything on the screen black and all of the relevant text to a deep red.  In conjunction with a red plastic cover, the screen is very readable.

3.       Adjust Screen Brightness:  I adjust the screen brightness to be as dim as possible.  These three steps were taken to create the results in these tests on a 16.4" laptop screen.

4.       Point the screen to the North:  I try to setup so that the laptop screen itself is always pointed to the north on the observing field.  Few observers are ever trying to observe an object that is low in the north, so this setup puts my screen out of the line of fire of almost every observer on the field. 
                I don't expect that this will be the final word on the subject.  Astronomers love a lively debate and this will continue to be debated long into the future.  I simply hope that my admittedly unscientific experiment has added to the discussion in a positive manner.

Aug 16, 2011

The North American Mosaic

As a member in good standing of the Saguaro Astronomy Club I've long vowed that if somebody asks me to give something back to this wonderful hobby chronic obsession in a way that might benefit someone else - that I would always say yes.  One of the great things about amateur astronomy is the general willingness of most people involved to share their knowledge in an effort to help the other guy.  One of the reasons that I write this blog (haphazard as it may be) is in an effort to share what I learn with a wider audience if anyone should be interested.  Each August our club has a meeting where all of the speakers are club members giving shortish presentations on the topic of their choice.  When I was asked to be one of the presenters I immediately agreed to the task even though I had no idea what I could talk about for 10 whole minutes beside myself - and audiences tend to find the subject of me to be an underwhelming one at best. 

A normal night at Fredericksen Meadow.
After pondering the possible topics for a few days I decided that I would cover the capture and processing involved in creating a CCD mosaic.  Never mind that I'd never actually even tried to do one myself. Nothing helps get the juices flowing better than a little bit of pressure, even if it's self-induced.  This was back at the end of June just after the new moon weekend.  No worries on my end though - I still had all of July and part of August to capture the data, create a mosaic image and put together a 10 minute presentation.  All I needed was a little bit of dark sky to capture the data.  I was confident that I could do the rest without too much trouble.  I planned a trip out in the middle of July solely to capture the raw data, but the Arizona monsoon season had other ideas and the weekend was clouded out.  Since I live in such a dry climate I immediately made plans to head north to my favorite observing site for the weekend with some friends in the cool pines and 7000' of Fredericksen Meadow in North/Central Arizona.  Three nights in the cool pines and I literally never even took the telescope out of the truck because it didn't stop raining and storming long enough to set up.  Shut out.  Again.  Not for loss though, it was a wonderful weekend hiking and hanging out with my astro-friends and just generally loving how awesome I have it in this life and how little I've done to deserve it.  Now I was beginning to get nervous.  I had only one weekend left to capture data - process the data - and be ready to present it the Friday after that. 


I casually threw out a comment to my friend Chris that I was thinking of a trip to the club's Antennas site to capture the data as he and I both live in advantageous locations for easy access to this dark sky site.  However - and you knew there would be a 'however' - it's in the western part of Arizona in the low desert at the end of July.  It is not uncommon for temperatures to sprint right past 110ºF early in the day and stay there until well after dark.  My last time there - on March 31st - it hit 102ºF and it was blazing hot for such an early spring day.  But I digress.  Other club members told us we were crazy.  I heard rumors that there was a collection taken up to have our heads examined.  Since no one has approached us, I'll assume that nobody contributed. 
The 11" Edge HD and Hyperstar on a previous trip
to the Antennas site.
We made plans to arrive just after sunset and use the first couple of hours with the first quarter moon to get set up for the evening on this one night trip.  It was genius.  The Arizona monsoon couldn't have cooperated better.  The temperature when I arrived 5 minutes after sunset was 98ºF with 11% humidity and a slight breeze.  It was warm for sure, but comfortable.  By the time I completed setup and was ready to begin imaging at 9:30pm the temperature was down to 80ºF.  Chris and I enjoyed about 6 hours of imaging and observing in shorts and t-shirt weather under a beautiful mag 6.5 sky.  Using the Hyperstar rig I was able to capture 4 hours worth of data at f/2 on the North American & Pelican Nebulas to construct the mosaic.

To make a long story short, I constructed the mosaic and I was very happy with the result as shown above.  My presentation itself didn't go as well as I'd hoped.  I made the mistake (common with me) of trying to condense what was easily 45 minutes worth of material into ten.  I was really pleased to show off how I'd processed the image in Photoshop and had a series of slides that walked through the process.  The actual work in Photoshop went quite quickly so I put together a video-walkthrough of the steps that I took for some of my fellow club members who'd been asking me questions about my own workflow.

NGC 7000 and IC 5070 Mosaic (North American & Pelican Nebulae)
4 frame mosaic - 24 exposures - 2 minutes per sub exposure
Captured with a QHY8PRO CCD Camera
Celestron 1100HD Telescope with Hyperstar @ f/2 on a Celestron CGE Mount
 To make a long story short, I constructed the mosaic and I was very happy with the result as shown above.  My presentation itself didn't go as well as I'd hoped.  I made the mistake (common with me) of trying to condense what was easily 45 minutes worth of material into ten.  I was really pleased to show off how I'd processed the image in Photoshop and had a series of slides that walked through the process.  The actual work in Photoshop went quite quickly so I put together a video-walkthrough of the steps that I took for some of my fellow club members who'd been asking me questions about my own workflow.

It's just shy of 10 minutes a straight, unedited walkthrough that shows everything that was done in Photoshop to process the images after they were calibrated and stacked in Maxim DL.  I've added the video here too for anyone that might get some benefit out of it.  A couple of notes about the video:
  • There is no audio track in the video.  I simply hit record and did a walkthrough while Camtasia captured the screen for me. 
  • In the first step you'll see that I run an action against all 4 frames that isn't really shown.  That action is simply a curve followed by four iterations of levels that adjust the gamma slider.  I did this via action so that I could insure that all 4 frames were initially stretched with exactly the same settings.  There is no hidden voodoo there - and the later iterations of levels are all done in the same way.
  • Since I'm not sure how well this video is going to get mangled by the compression algorithms, Here is a link to a full Windows Media version.  It's a 21MB file, so you may want to download it before attempting to watch it.
  • The video does go through the steps pretty fast.  The pause button is your friend if you're trying to follow along and try any of it yourself.